Get Started with Ptyxis: A How-To Guide for Ubuntu's New Default Terminal
Introduction
Ptyxis is a modern terminal emulator built with GTK4 and libadwaita, designed to integrate seamlessly with the GNOME desktop. Developed for contemporary software development workflows, it features robust container support for tools like Podman, Distrobox, and Toolbox. Already the default terminal on Fedora and upcoming Ubuntu releases, Ptyxis is rapidly gaining popularity. This guide walks you through its most useful features—tab management and color schemes—so you can boost your productivity right away.
What You Need
- A Linux distribution with Ptyxis installed (e.g., Fedora 39+ or Ubuntu 24.04+).
- Optional: Podman, Distrobox, or Toolbox for container workflows.
- Basic familiarity with terminal operations.
Step 1: Open Ptyxis and Explore the Interface
Launch Ptyxis from your applications menu or by pressing Super and typing "Terminal." The default window shows a single terminal session with a clean title bar. Notice the two key buttons: the Show open tabs button (top-right, looks like a grid icon) and the three-dot menu (top-right). The three-dot menu gives you access to preferences and other settings.
Step 2: Create and Manage Tabs
Tabs are the cornerstone of multitasking in Ptyxis. To create a new tab, press Ctrl+Shift+T or click the + button next to the existing tabs (if shown). Each tab runs an independent shell session.
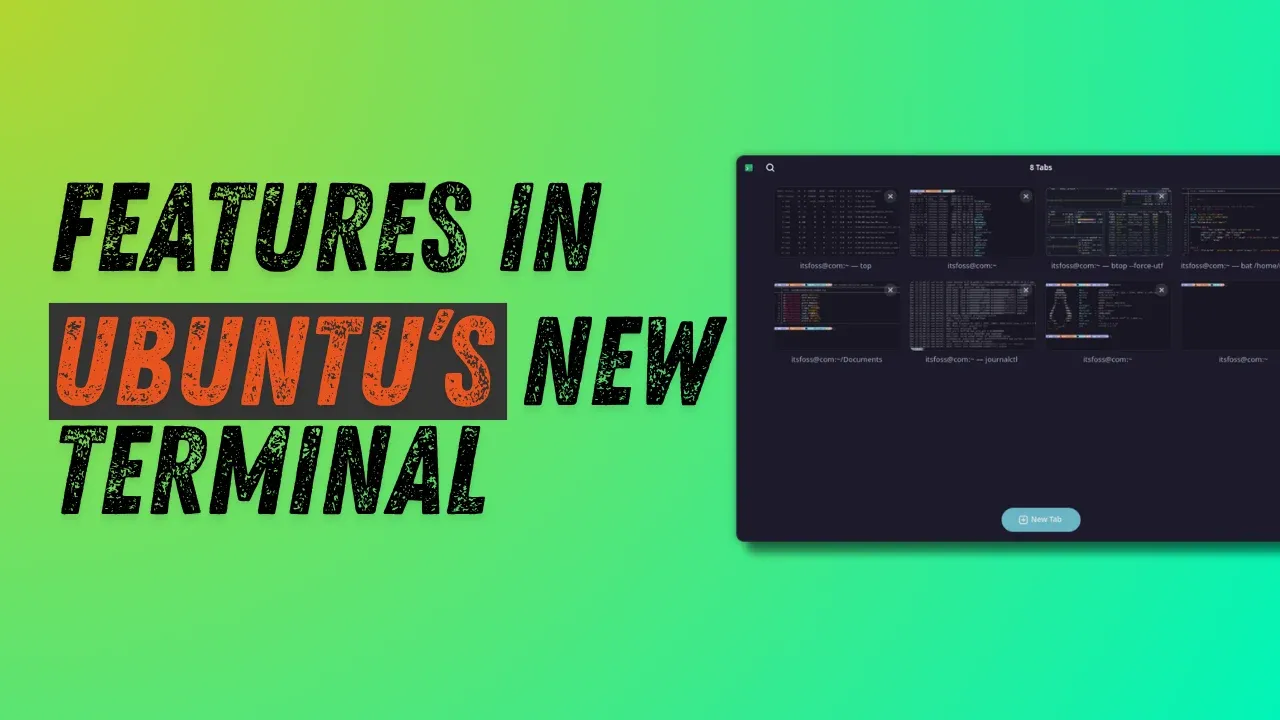
Use the Tab Overview
With multiple tabs open, click the Show open tabs button. This launches a visual overview similar to GNOME’s Activities screen. Here, each tab displays its title and a small preview of its content. You can:
- Drag and drop tabs to rearrange them.
- Pin tabs by clicking the pin icon, keeping important sessions always visible at the top.
- Right-click a tab to access more options.
Step 3: Rename Tabs for Clarity
When juggling multiple projects, clear tab titles are a lifesaver. In the tab overview, right-click any tab and select Set title. You can choose to:
- Prepend a name to the default process title (e.g., "Dev Server - bash").
- Create a completely custom title by entering any text.
Renamed tabs make it easy to identify sessions at a glance.
Step 4: Search Through Tabs
Have a lot of open tabs? Use the search button (magnifying glass icon) in the title bar. Click it and type any part of a tab's title. Ptyxis will filter the overview to show only matching tabs. This is incredibly handy when you're managing a dozen sessions simultaneously.

Step 5: Customize Your Color Scheme
Ptyxis offers a wide variety of preset color schemes. To change yours:
- Click the three-dot menu (top-right) and select Preferences.
- Navigate to the Appearance tab.
- Under Color scheme, click Show all palettes.
- Browse the list of presets—each shows a preview. Click one to apply it immediately.
The change takes effect at once, so you can experiment freely.
Step 6: Explore Additional Features (Optional)
While this guide focuses on tabs and colors, Ptyxis has more to offer. For instance, you can set custom keyboard shortcuts in Preferences, split terminals horizontally or vertically, and configure container integration. These features are documented in the application’s help menu.
Tips for an Enhanced Experience
- Customize your prompt: The screenshots in this guide show a customized shell prompt. You can achieve a similar look by downloading our config file from the GitHub repo or watching our video tutorial.
- Use keyboard shortcuts: Learn common shortcuts like Ctrl+Shift+T (new tab), Ctrl+Shift+W (close tab), and Ctrl+PageUp/PageDown to switch tabs.
- Pin frequently used tabs: Pinning prevents accidental closing and keeps essential sessions front and center.
- Experiment with color schemes: A well-chosen palette can reduce eye strain during long coding sessions.
Ptyxis is designed to be intuitive and powerful. With these steps, you’ll master its core features and enjoy a more organized terminal workflow.